How to Create a Realistic Ember Bed for a Gas Fireplace

There’s something magical about the warm glow of a traditional wood-burning fireplace. With the right ember products, you can recreate that cozy, classic look in your gas fireplace — giving your home the comforting ambiance of a real fire.
This guide focuses on creating a traditional, wood-burning appearance. If your goal is a modern, dazzling, or colorful display using fire glass, fire stones, fiber balls, or beach-inspired mixes, those are beautiful options too — but this guide is all about realistic flame and ember effects.

Understanding the Two Parts of a Realistic Ember Bed
The Primary Ember Bed (Under and Around the Log Set)
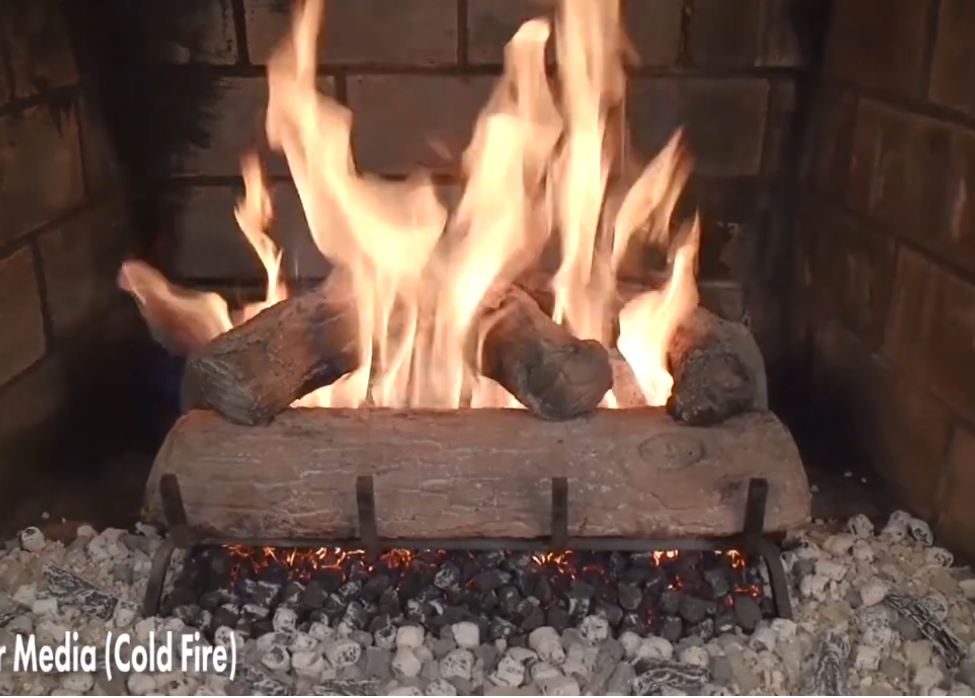
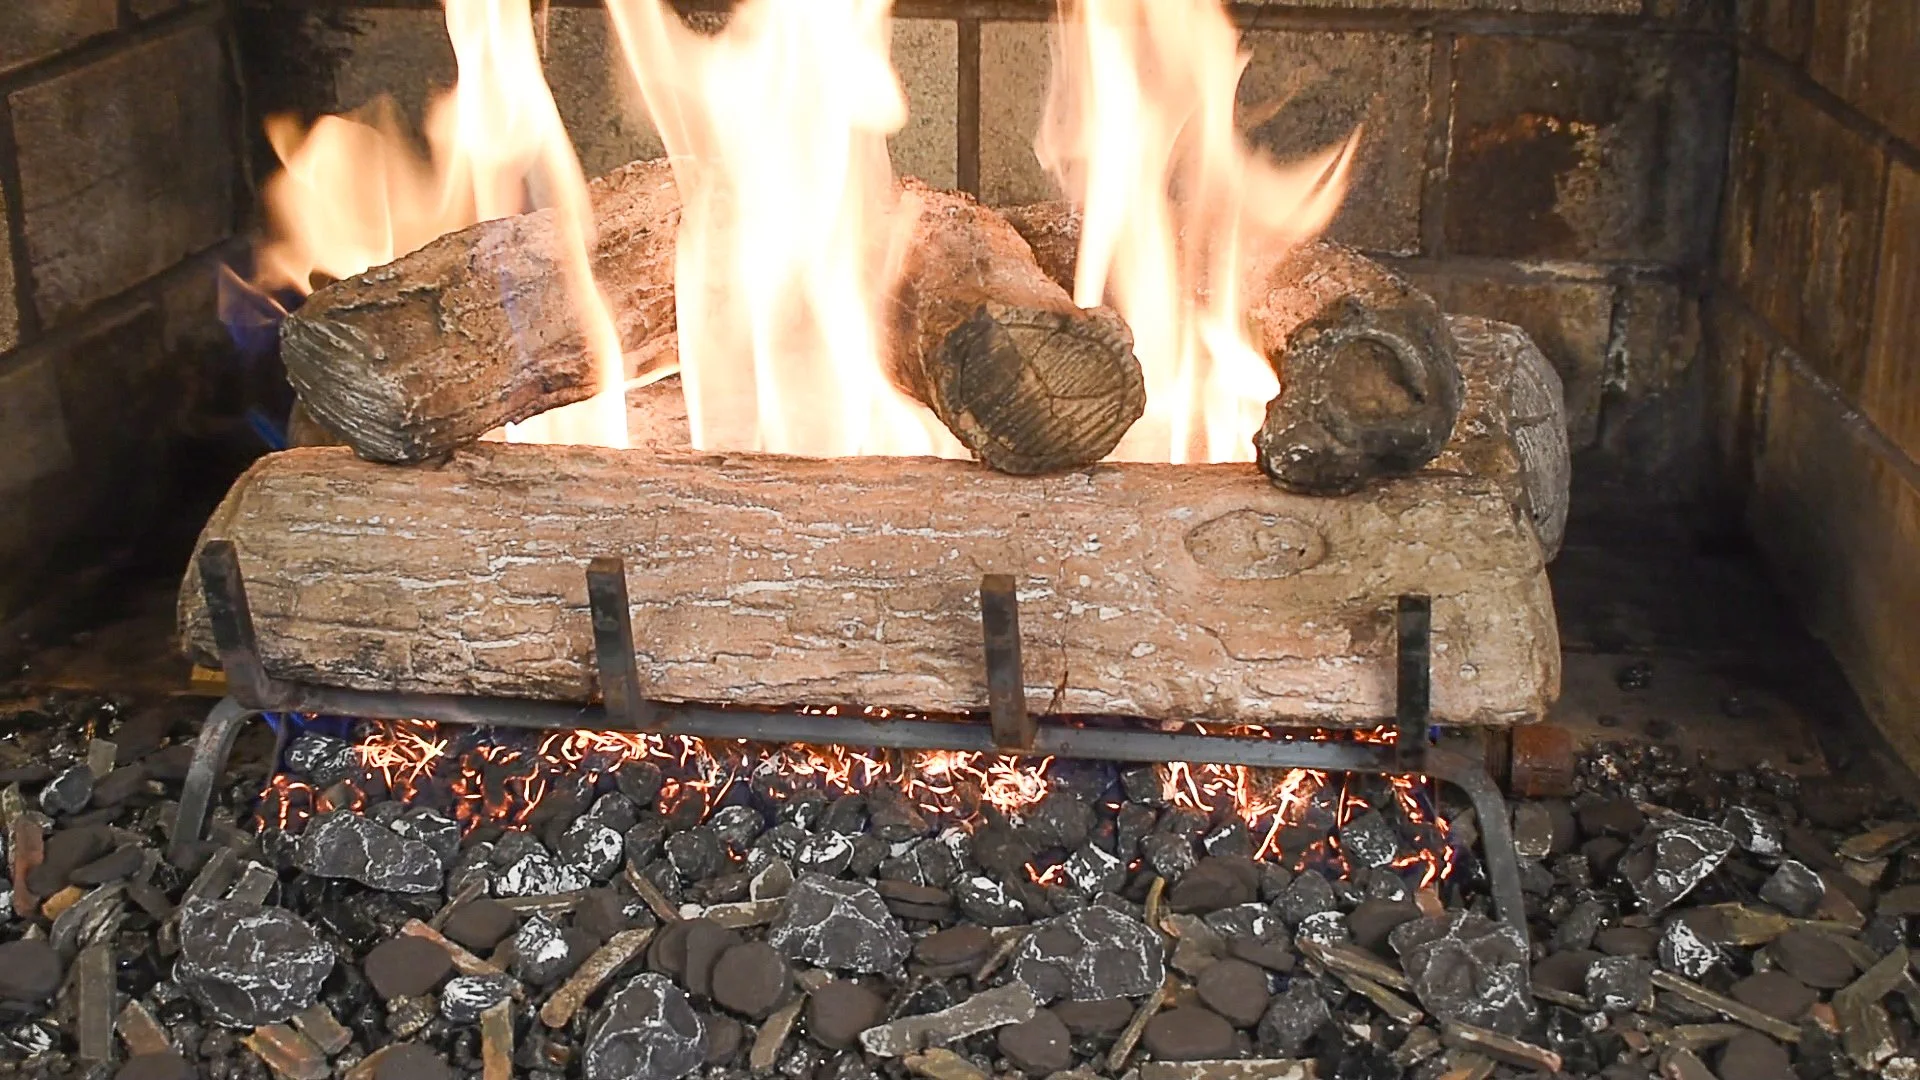
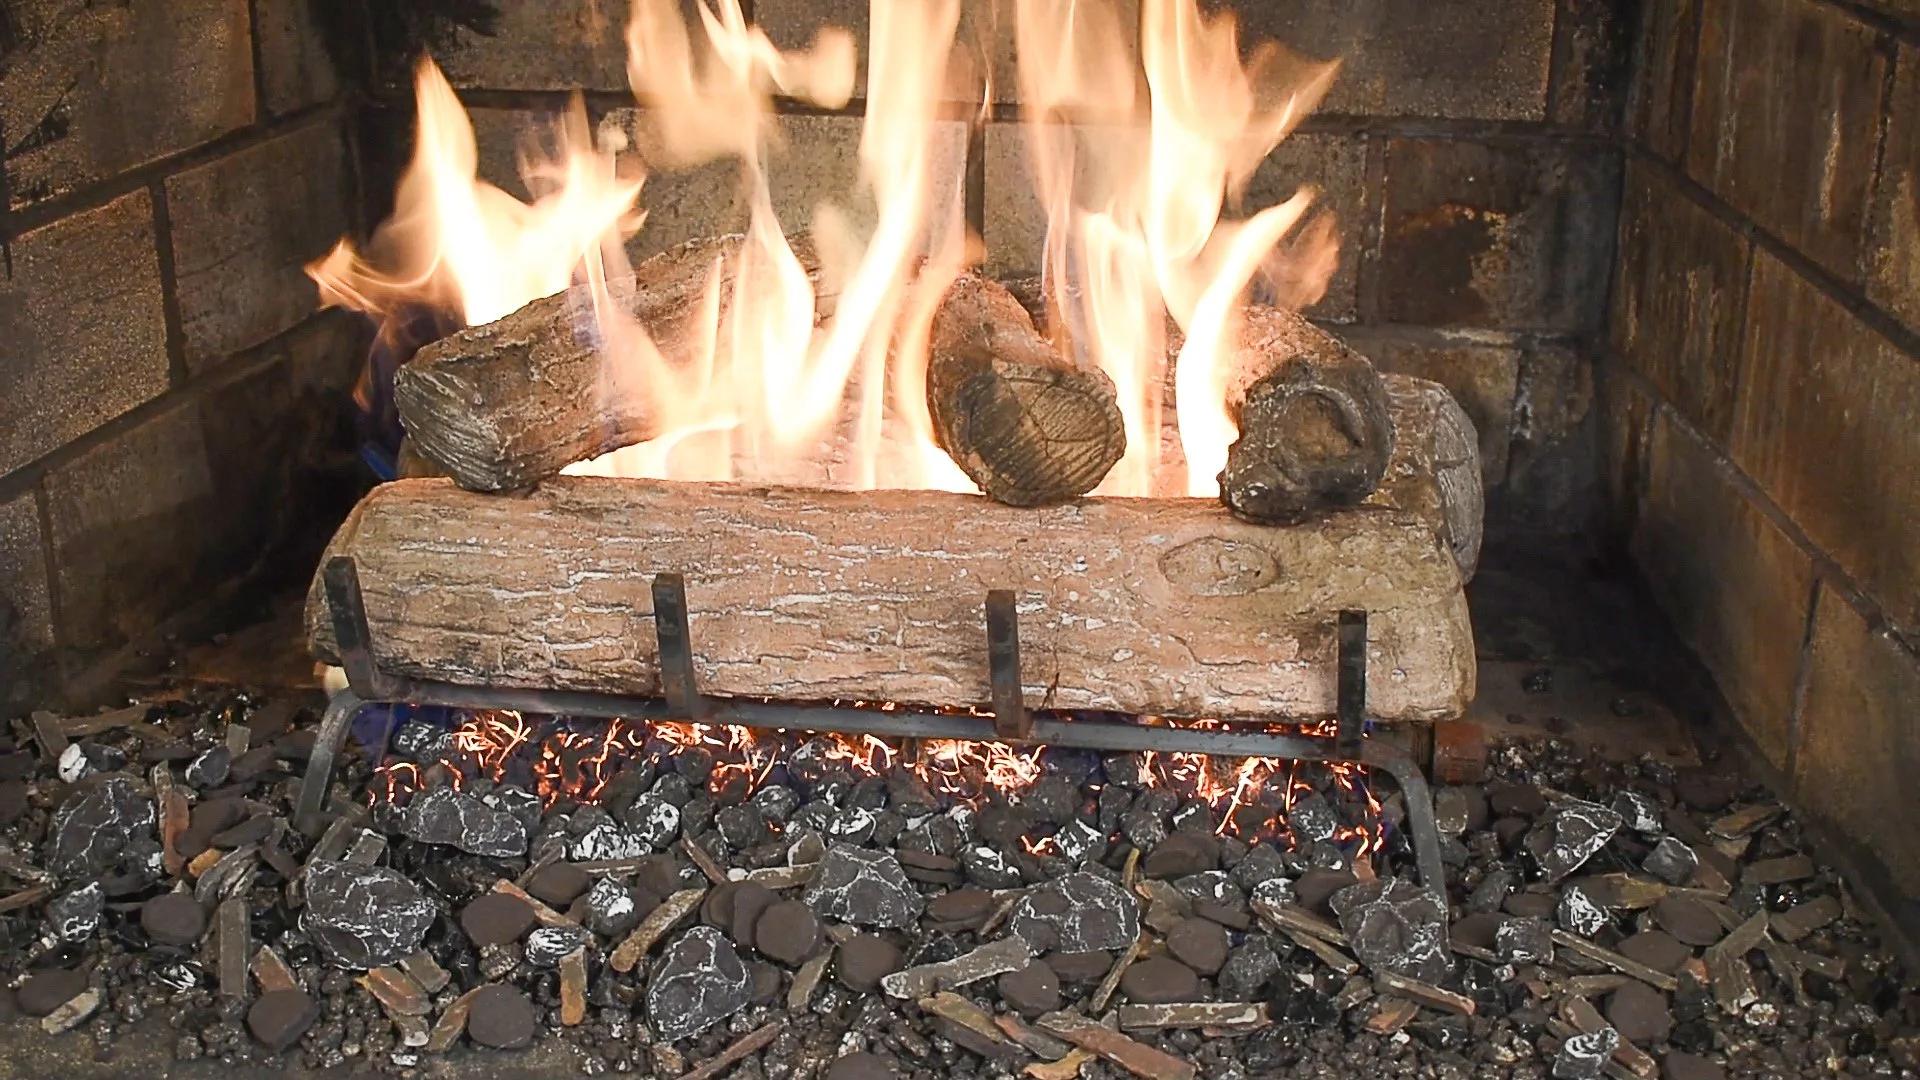
The primary ember bed is the heart of your fireplace design. It is located directly beneath and immediately around your gas log set, just where embers would be actively glowing in a real wood fire.
Key points:
Glow enhancers — glowing wool and neon embers — go here.
Size varies based on hearth and log set, but generally extends a few inches beyond the logs for a natural taper.
Build a structure with vermiculite and shaped embers, or a mixed ember kit.
Glowing wool comes in one large clump. For the most realistic effect, pull off dime-sized pieces and place them strategically. A few small pieces scattered naturally create depth and variation, while one large clump tends to look flat and artificial.
Notice the Neon embers are typically placed in small pieces on top of the glowing wool
What Makes a Gas Fireplace Look Like a Real Wood Fire?
A wood-burning fire has depth, variation, and a natural glow that seems to come from within the embers. Flames rise naturally from this bed of glowing coals, creating warmth and atmosphere.
The key to realism is how the ember bed is structured and layered, combined with the placement of glow enhancers. The right setup hides burner hardware while making flames appear to emerge naturally.
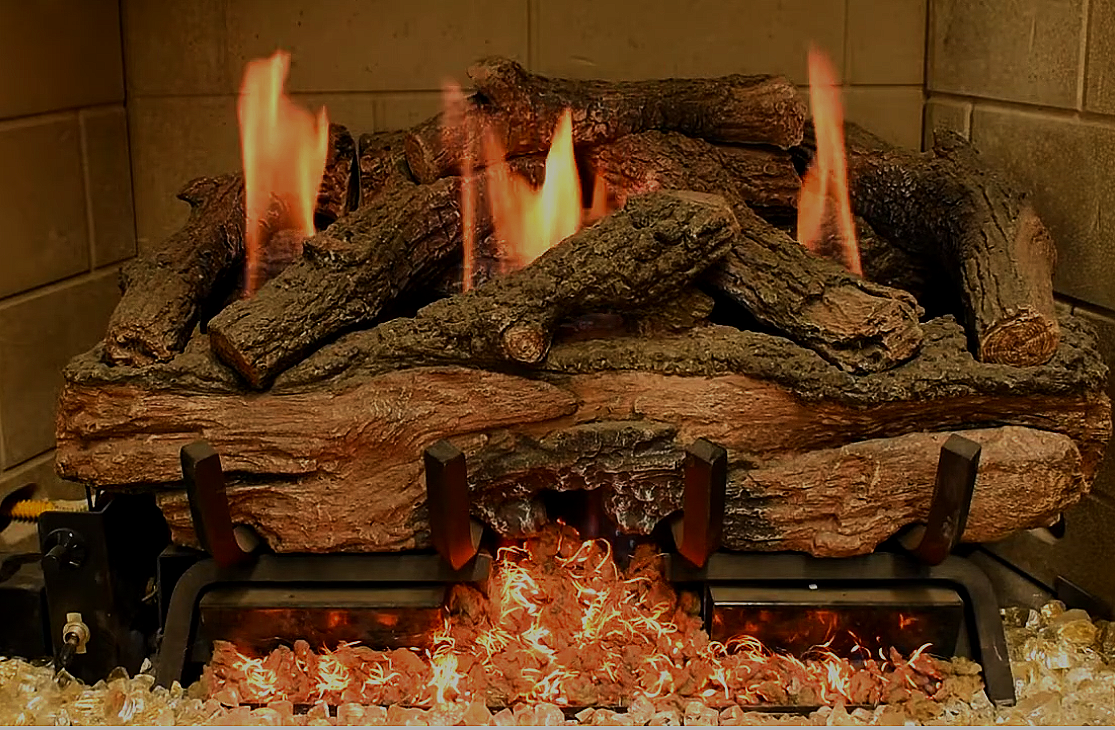
The Secondary Ember Bed (Front and Outer Area)
The secondary ember bed surrounds the primary area, extending toward the front of the hearth. It simulates partially burned embers and ash accumulation, adding depth and realism.
Key points:
Lower density and glow than the primary bed
Can be built using:
Vermiculite + shaped embers
OR a mixed ember kit for convenience
Notice the transition from the primary to the secondary ember base
Building the Structure of the Ember Bed
Start with the structural components:
Vermiculite: Adds texture, structure, and safe flame interaction. This simulates the extremely fine ash found around a wood-burning fireplace
Shaped Embers: Simulates the small splinters or partially burned wood that accumulates around a wood-burning fireplace. These are normally placed over the vemaculate base to add realism and depth
Mixed Ember Kits: Pre-curated combination of vermiculite and shaped embers, perfect for primary or secondary beds. Availible in several color options, the muted greys or blacks give the most natural-looking fireplace displays. The mixed ember kits are the easiest way to create a natural-looking fireplace display.
Tip: If a natural looking fireplace display is your goal You can use either pre-curated mixed ember kits or use individual components to build your own custom ember bed but is best to stick with the natural looking colors rather than the vivid reds that are alos availible.

Vermiculite Base

Shaped Embers
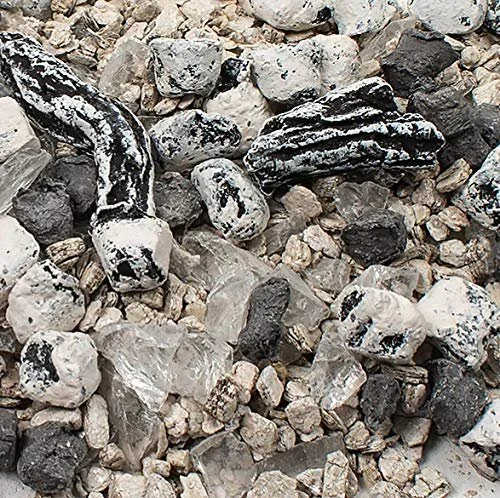
Mixed Ember Kit
Using Glow Enhancers for a Natural, Realistic Effect
Glowing Wool — Placement and Use
Install over the vermiculite, shaped embers, or mixed ember kits in the primary ember bed only
Use sparingly — a little goes a long way
Break the large clump into dime-sized pieces and scatter strategically
Avoid covering the entire bed; overuse creates a flat, unnatural glow
Place where flames will naturally interact for subtle highlights
Neon Embers — Subtle Highlights
Accent points that catch flame light, not dominate it
Place partially hidden in the primary ember bed
Avoid symmetry; natural randomness is key
It’s Best to cut the metal fibers into 2 to 3-inch pieces, roll them into a ball, and place them over glowing wool for a more natural look
Enhances realism without overpowering the natural glow
Additional Tips to Create a Natural Looking Gas Fireplace
Choose Realistic Colors for Ember Materials
To maintain a natural appearance:
Stick to muted, earthy tones: amber, charcoal, ash-like grays
Avoid vivid reds or overly bright colors
Combine variations in color and shape for depth and authenticity
Burner Visibility, Flame Interaction, and Overall Realism
Flames should appear to emerge from the ember bed, not sit on top of the media
Ember media should hide the burner while allowing gas flow
Avoid piling glowing wool or embers too high, which distorts flame appearance
Step back frequently to assess the effect
Safety and Best Practices
Safety is always the top priority:
Always ensure that the gas to the fireplace is off and the fireplace is cool to the touch before starting your makeover.
Always follow the fireplace and burner manufacturer's guidelines
Never block burner ports
Keep media loose for proper gas flow
Correct placement ensures realism without compromising safety
Bringing It All Together
Step back and observe the ember glow before adding more
Adjust gradually — layering in small amounts produces the most natural effect
Combine structure, glow, and color variation for convincing results.
YouTube Video Walk-Through
Related Resources
What Are Embers? — Quick overview and reference
Glowing Wool Products — Shop and color options
Neon Embers — Subtle glow accents
Mixed Ember Kits — Pre-curated options for primary and secondary beds
Shaped Embers — For custom setups